How to Build a Simple Raised Planter for Small Spaces
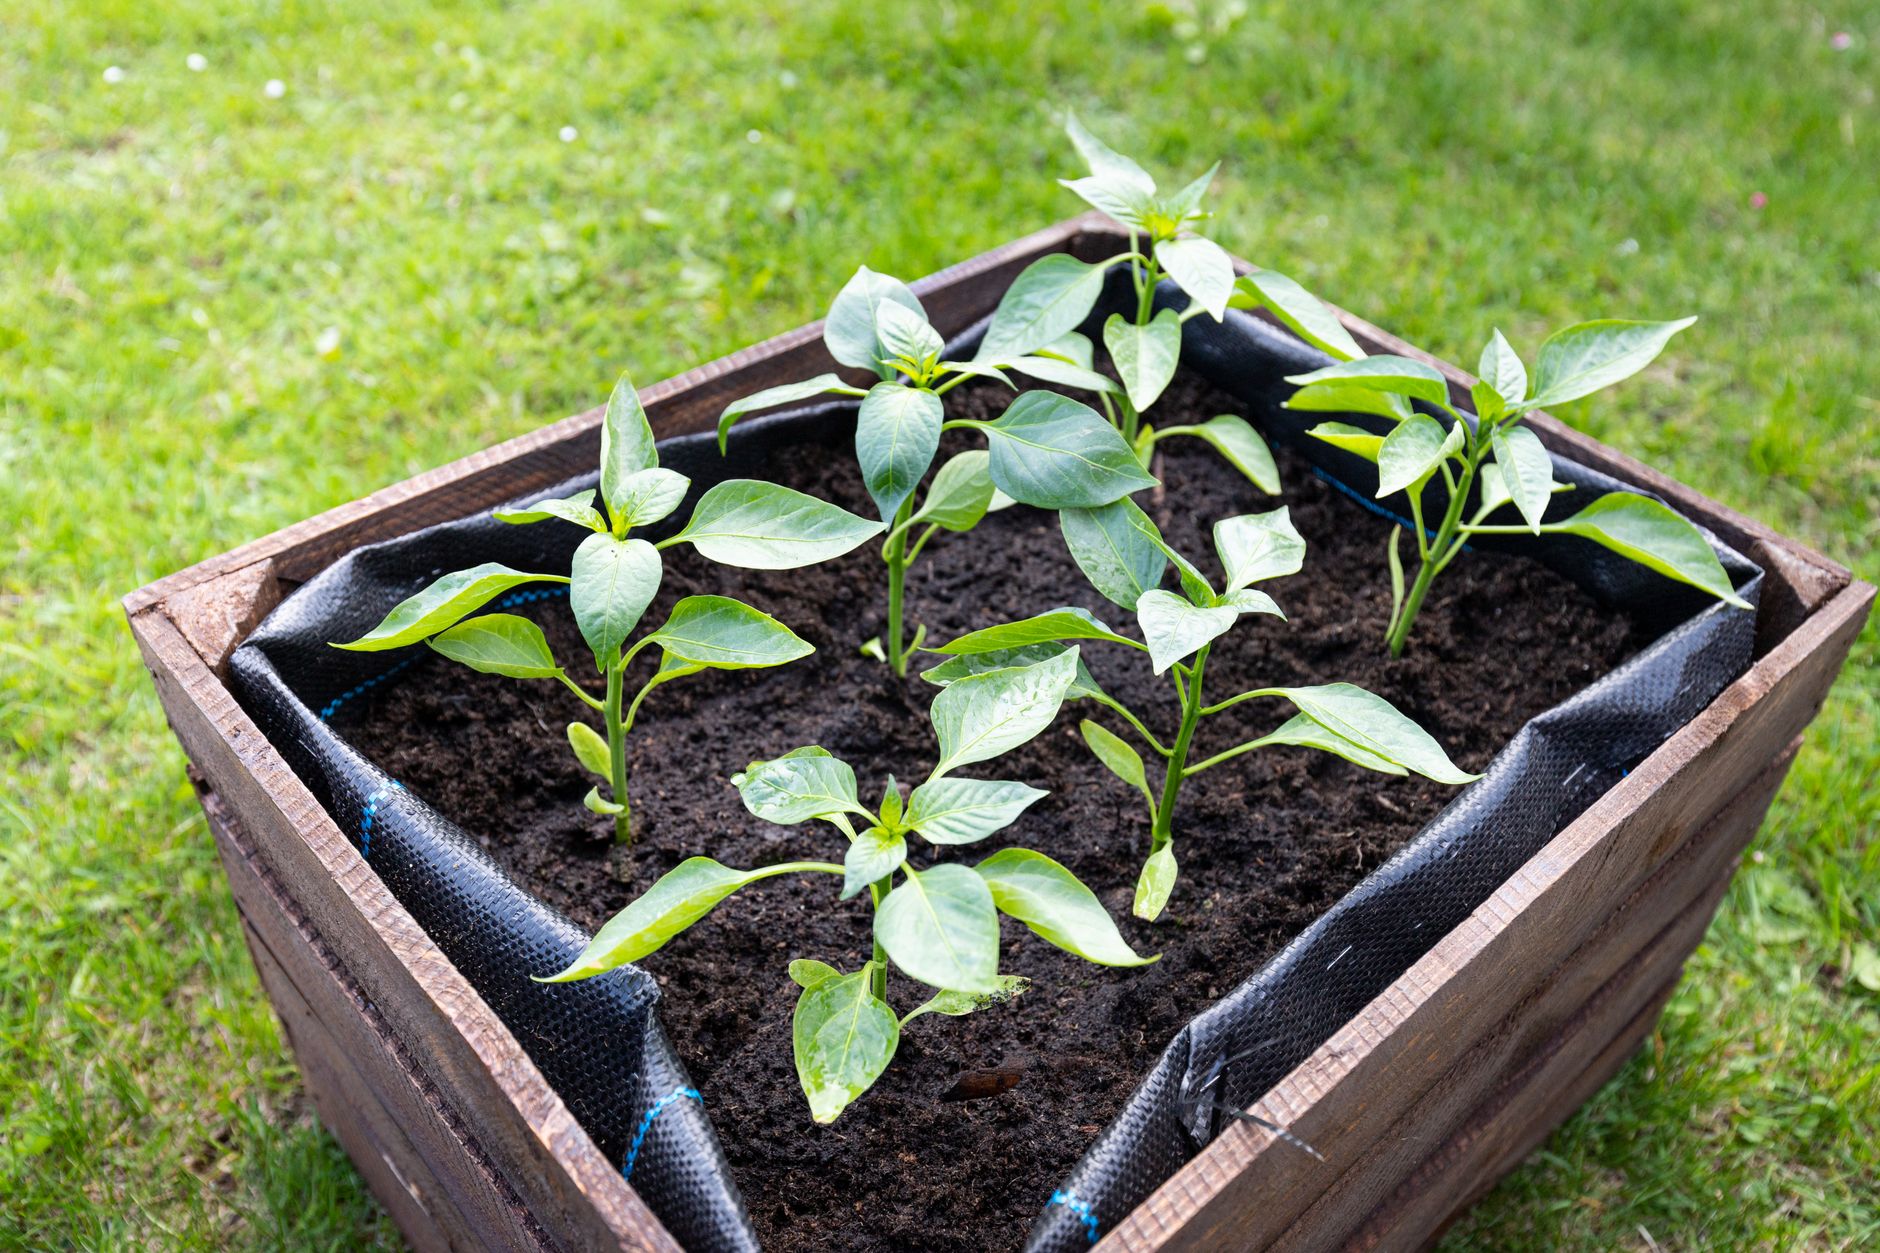
Store-bought planters are often the wrong size, too flimsy, or made from questionable materials. With basic tools and a straightforward plan, you can build a sturdy raised bed sized for a patio or balcony—complete with the site checks, material choices, and drainage details that keep it safe to use.
Prefab planters often disappoint—too flimsy, the wrong size, or made from materials you would rather not grow food in. Building your own lets you match the dimensions to your patio or balcony and choose wood and fasteners you trust. You do not need advanced carpentry skills, but you do need a clear plan and attention to weight, drainage, and surface protection.
Site Check: Picking a Safe and Practical Location
Before you buy lumber, take a close look at where the planter will go. Is the patio level, and does it have enough room for both the planter and foot traffic? If you are working on a balcony or deck, consider the weight of wet soil—some surfaces are not rated for heavy loads. Look for at least a foot of clearance around the future planter for watering and maintenance. If you hear any creaking or see flexing when you step where the planter will sit, call a building professional. Do not place your planter where it could block exits, vents, or trap water against walls. For apartments or shared spaces, always double-check building rules about what is allowed on balconies or patios.
Material Choices: Sorting Out Safety and Durability
Choosing the right wood is crucial, especially if you will grow edibles. Cedar and redwood are naturally rot-resistant and safe for food. Pressure-treated pine can work, but only if it is clearly labeled as safe for raised beds or edibles—never use old railroad ties or wood with flaking paint, since these may harbor toxic chemicals. If you are tempted by composite boards, check the manufacturer's documentation for food safety. For all builds, pick exterior-grade screws or bolts (galvanized or stainless steel) to prevent rust and joint failure. Avoid shortcuts with fasteners—indoor screws will fail quickly outdoors.
Gathering Tools and Materials
With your site measured and materials chosen, gather the basics: a saw (hand or power), drill with bits, screwdriver, measuring tape, speed square, pencil, and sandpaper. If you have clamps, keep them handy—they make assembly much easier. Do not forget safety gear: gloves, eye protection, and a dust mask if you are sanding or cutting treated wood. If you are working near old paint, especially on homes built before 1978, consult EPA guidance before disturbing any surfaces. It is better to pause than risk exposure to hidden hazards.
Cutting Lumber: Precision Pays Off
Mark all cut lines clearly with a square and pencil. Double-check measurements before cutting—mistakes here ripple through the entire build. Make each cut as straight as possible; a small error can make the finished box wobbly or weak. After cutting, dry-fit the panels together on a flat surface to check for gaps or warping. If a board is badly twisted or split, replace it—do not try to force it into place. Sand all sharp edges and splinters, especially where hands will rest or where soil might snag liners.
Assembly: Bringing the Planter Together
Start by assembling the long sides first, then attach the shorter ends. Pre-drill screw holes to avoid splitting the wood, especially near corners. Use clamps to hold pieces steady if you have them. As you fasten each joint, check for squareness—measure diagonals or use your speed square. If the planter rocks or racks diagonally, loosen and re-align before tightening all fasteners. Space screws evenly (about every 6–8 inches), and avoid over-tightening, which can weaken the wood. If you hit a snag—like a split board or a joint that will not align—pause and fix it now, not later.
Drainage and Surface Protection: Essential for Longevity
Before adding soil, drill drainage holes in the planter base—about every 6–8 inches for small planters. This prevents water from pooling and causing rot or mold. If you are lining the planter, use food-safe landscape fabric or perforated plastic, and make sure it does not block drainage holes. Avoid using non-breathable liners that trap moisture. For planters going on wood decks or balconies, consider adding rubber feet or pavers underneath to keep the bottom dry. If you notice standing water or persistent dampness around the planter, reassess drainage or location to prevent long-term damage.
Finishing Touches: Filling, Positioning, and First Watering
Move the planter into its final spot before filling—once full, it may be too heavy to safely lift. Add a layer of gravel or coarse stone at the bottom to aid drainage, then fill with quality soil suited to your plants. Water thoroughly and check for leaks or pooling underneath. If the planter shifts, rocks, or causes water to run toward building walls, adjust its position or add shims for stability. Take note of any signs of mold or musty odors in the first weeks, and address promptly to avoid long-term moisture problems.
Troubleshooting and When to Get Help
Most issues—like minor gaps or wobbles—can be fixed with a little patience and adjustment. But if you encounter any of the following, stop and consult a professional:
The supporting surface flexes, creaks, or shows signs of water damage.
You discover old, peeling paint or suspect lead in the work area.
The planter cannot be made level or stable after reasonable effort.
You notice persistent mold, strong odors, or visible water pooling.
These are not just cosmetic issues—they can affect safety and the longevity of your planter and home.
U.S. Environmental Protection Agency, Mold Cleanup in Your Home — used for advice on preventing and addressing mold issues in planters and adjacent surfaces. https://www.epa.gov/mold/mold-cleanup-your-home
U.S. Environmental Protection Agency, Indoor Air Quality — referenced for context on ventilation and moisture control when placing planters near living spaces. https://www.epa.gov/indoor-air-quality-iaq
Hazel Bennett covers DIY projects and outdoor spaces for TopicFlex. She focuses on stepwise project planning, material lists, and outdoor-space improvements that renters and homeowners can approach carefully.
Mounting a shelf safely isn’t just about style—it’s about ensuring your wall, hardware, and installation method can handle the weight and use you have in mind. This guide walks you through each key decision, from evaluating your wall to choosing the right anchors, and highlights when to call a professional. Learn how to avoid common hazards and make your DIY shelf project both sturdy and safe.
Tackling a rental accent wall project can be a balancing act—transforming your space while making sure you don’t risk your deposit or violate your lease. This narrative walks through a practical day spent planning, prepping, painting, and restoring an accent wall in a rental, with a focus on reversible choices, safe materials, and clear communication with your landlord. Learn how to select the right paints, ventilate properly, and return your wall to its original state, all with safety and compliance in mind.
Renters often crave a kitchen upgrade but fear losing their deposit or damaging the walls. A removable rental kitchen backsplash promises style and practicality, but the process is riddled with pitfalls. From adhesive mishaps to moisture traps and uneven surfaces, this troubleshooting guide explores how to sidestep disappointment and create an upgrade that’s both attractive and truly removable. Learn how to select the right materials, prep your space, and avoid the most common failure modes—so your kitchen refresh is as stress-free as it is stylish.
Drafty doors are a common source of wasted energy and discomfort in any home, but sealing the gap without interfering with the latch mechanism requires careful planning. This practical guide walks you through selecting and installing the right weatherstripping to weatherstrip a drafty door, ensuring a snug seal that doesn’t compromise door function or safety. Whether you’re a seasoned DIYer or just starting out, you’ll find actionable advice to make your entryway both energy-efficient and easy to use.